
Continuous Keyboard
Anita Lillie's final project for MAS960: Principles of Electronic Music Controllers (Fall 2006)
- Overview
- Parts
- Control parameters & mapping
- Modes: Continuous and MIDI
- Cool effects
- Future development
- Videos
- Tools / Peripherals
Overview
I started with the goal of trying to make a scalable, continuous, play-anywhere keyboard. I built an interface in which the user activates lights, which in turn are mapped to sound.
The user wears a glove fitted with LEDs at the fingertips, which turn on when the user presses each finger onto the playing surface, within view of the camera. A Max/Jitter patch reads the incoming video stream, and outputs a note corresponding to the position and brightness of the lit LED.
Parts
Since I wanted my instrument to be "play-anywhere", I tried to keep the equipment necessary to a minimum. The connection between the controller and the computer is wireless (it's a camera!), and the surface is whatever is convenient.
Here's everything you need to play the instrument:
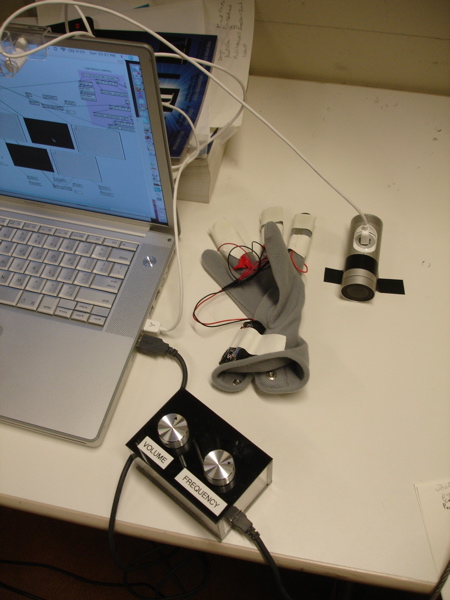
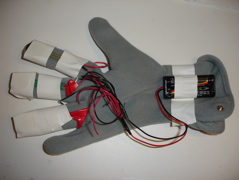
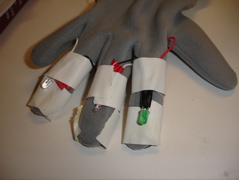
- Glove
The system consists of a glove fitted with FSRs and LEDs at the fingertips. The FSRs along the underside of the finger turn on the LEDs on the other side of the finger: the harder you press, the brighter the LED glows. This version has three LEDs: white, red, and green; therefore, it plays up to three notes at a time. (The Max patch can be easily recalibrated to follow any three colors, not just those used here.)
- Video camera
I used Apple's iSight camera. The settings for the camera can be adjusted to play the instrument in differently-lit environments. (I turned off all automatic adjustment on the camera -- focus, gain, etc -- by default.)
- Laptop:
My 1.5 GHz PowerBook G4, 1.5 GB RAM
- Software:
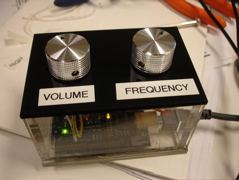
- Volume and frequency control box (optional)
This box has two knobs, one for volume adjustment, and another for frequency adjustment. The volume control changes overall volume for the system. The frequency knob adjusts the top/high end of the frequency range. (The lowest point of the range is fixed at 20 Hz.) So, the user can turn the frequency knob all the way up to achieve a large frequency range, or can turn the knob all the way down to focus play on a very small range of pitches.


Control parameters & mapping
I intentionally kept the instrument mapping simple, so that the instrument is intuitive and accessible. Position (x-axis) maps to pitch; brightness maps to amplitude.
Video: position mapping -- three tones and glissando
Video: amplitude mapping -- brighter means louder
The volume/frequency control knobs allow the user to change those same parameters independently of finger movement, if desired.
Modes: Continuous and MIDI
Usually I play this instrument in "continuous mode", which means that I allow the user to play any frequency within the defined pitch range. However, I did also create a "MIDI mode" that maps the continuous pitches to MIDI notes, that are output to the FM7.
Cool effects
- Attack
One of the most interesting effects of the project design is how the attack of each tone is dependent on the surface being played. On a harder surface (like a table), the LED turns on much faster, and the sound is suddenly loud. On a softer surface (like a pillow), the LED turns on much more gradually, and doesn't get as bright, which results in a softer attack and lower final amplitude.
Video: attack changes as a result of surface
(I play tones on the table, and then on a few layers of my friend's scarf. This video isn't a great demonstration, but hopefully the concept is clear.) - Stretching of playing area
- "Zooming": movement towards the camera
If, instead of playing along the edge of a table (as I am in most of these videos), you were to play along an uneven surface, you can expand and contract different regions of the playing area. For example, imagine you were to take just one edge of the playing region, and replaced it with a book that cut steeply towards the camera... the book would stretch out that edge of the pitch range, because it maps a greater area to a small amount of the pitch range, simply due to its angle relative to the camera.
Future development
- Add a visual guide to outline the playing area
- Update tracking to find multiple LEDs of the same color, so that less setup calibration is necessary and to make the system easier to scale to more fingers
- MIDI mode enhancement
- Make gloves of different sizes (mine cut off circulation in the fingers of some of the testers)
Videos
- Steve noodling
- Tracking as seen from the patch
- Two tones
- Three tones and glissando
- Amplitude change with LED brightness
- Volume knob control
- Frequency knob control
- Attack changes as a result of surface
- MIDI mode
- Two tone "zooming"
- More two tone "zooming"
- Presentation to class (December 11, 2006)
Tools / Peripherals
Copyright © 2008 by the Massachusetts Institute of Technology. All rights reserved.